

Ad & Integrations > Webhooks
Webhooks
Configure webhooks to send lead and event data from SuperFunnel to your custom backend, CRM, or Google Sheets in real-time.
Overview
The SuperFunnel webhook integration automatically sends data from your pages to any endpoint you specify. When a visitor submits a form or triggers an event, a JSON payload is POSTed to your configured URL in real-time. This is commonly used to sync leads with a custom backend, CRM, or Google Sheets.
Prerequisites
- A SuperFunnel account
- A publicly accessible endpoint URL to receive POST requests
- Access to server logs or your destination tool to verify incoming data
Step-by-Step Guide to Configuring a Webhook
Open the Integrations section
Click Settings > Integrations to access configuration options.
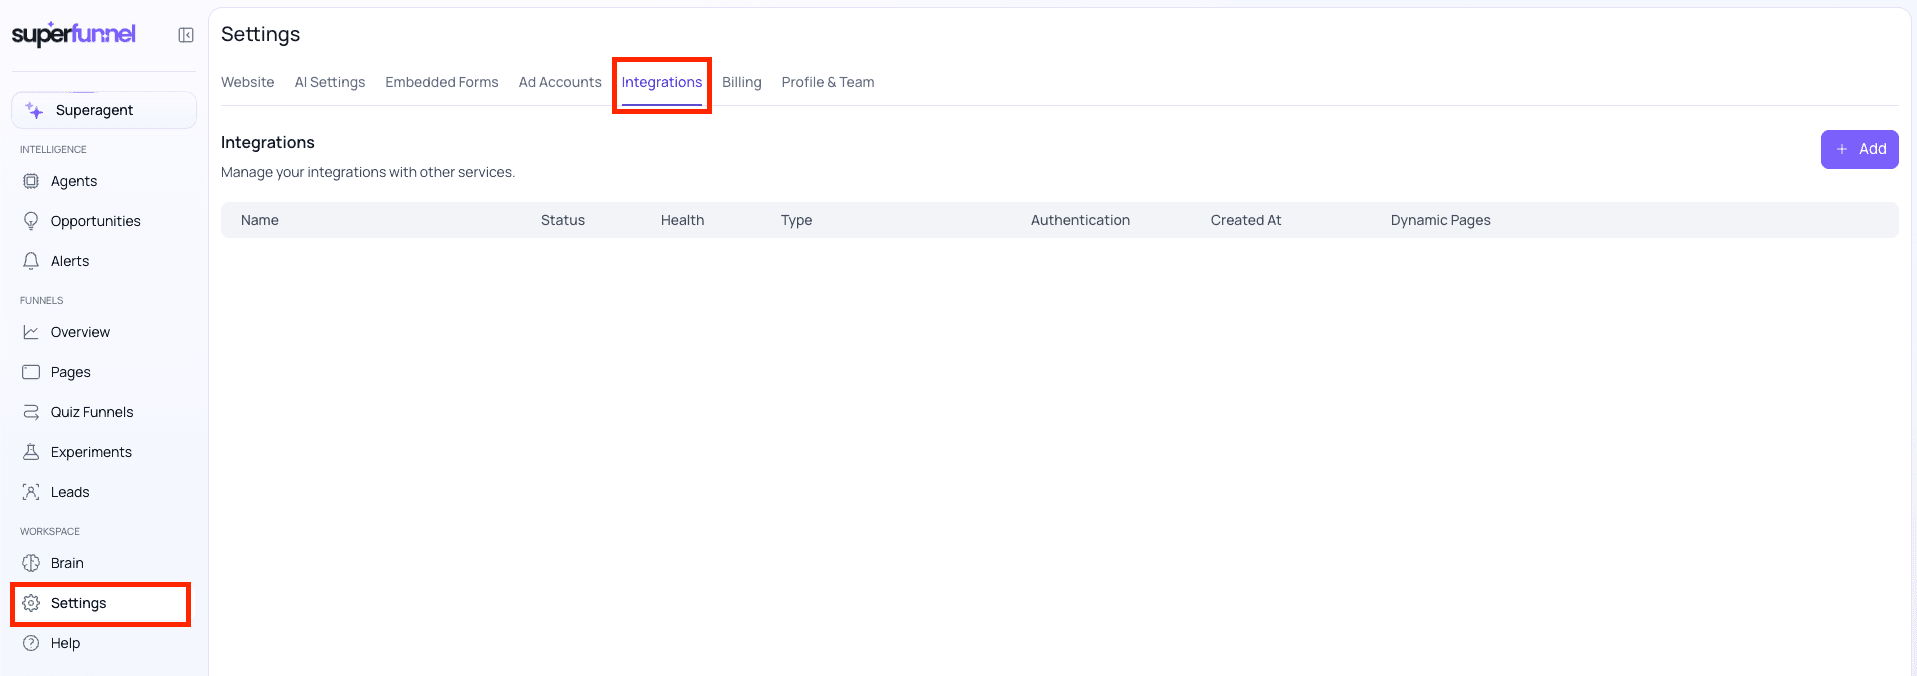
Add a new webhook
Click + Add > Webhook to begin setup.

Enter an event name
Give your webhook a descriptive name to identify the trigger (e.g., "New Lead Sync").
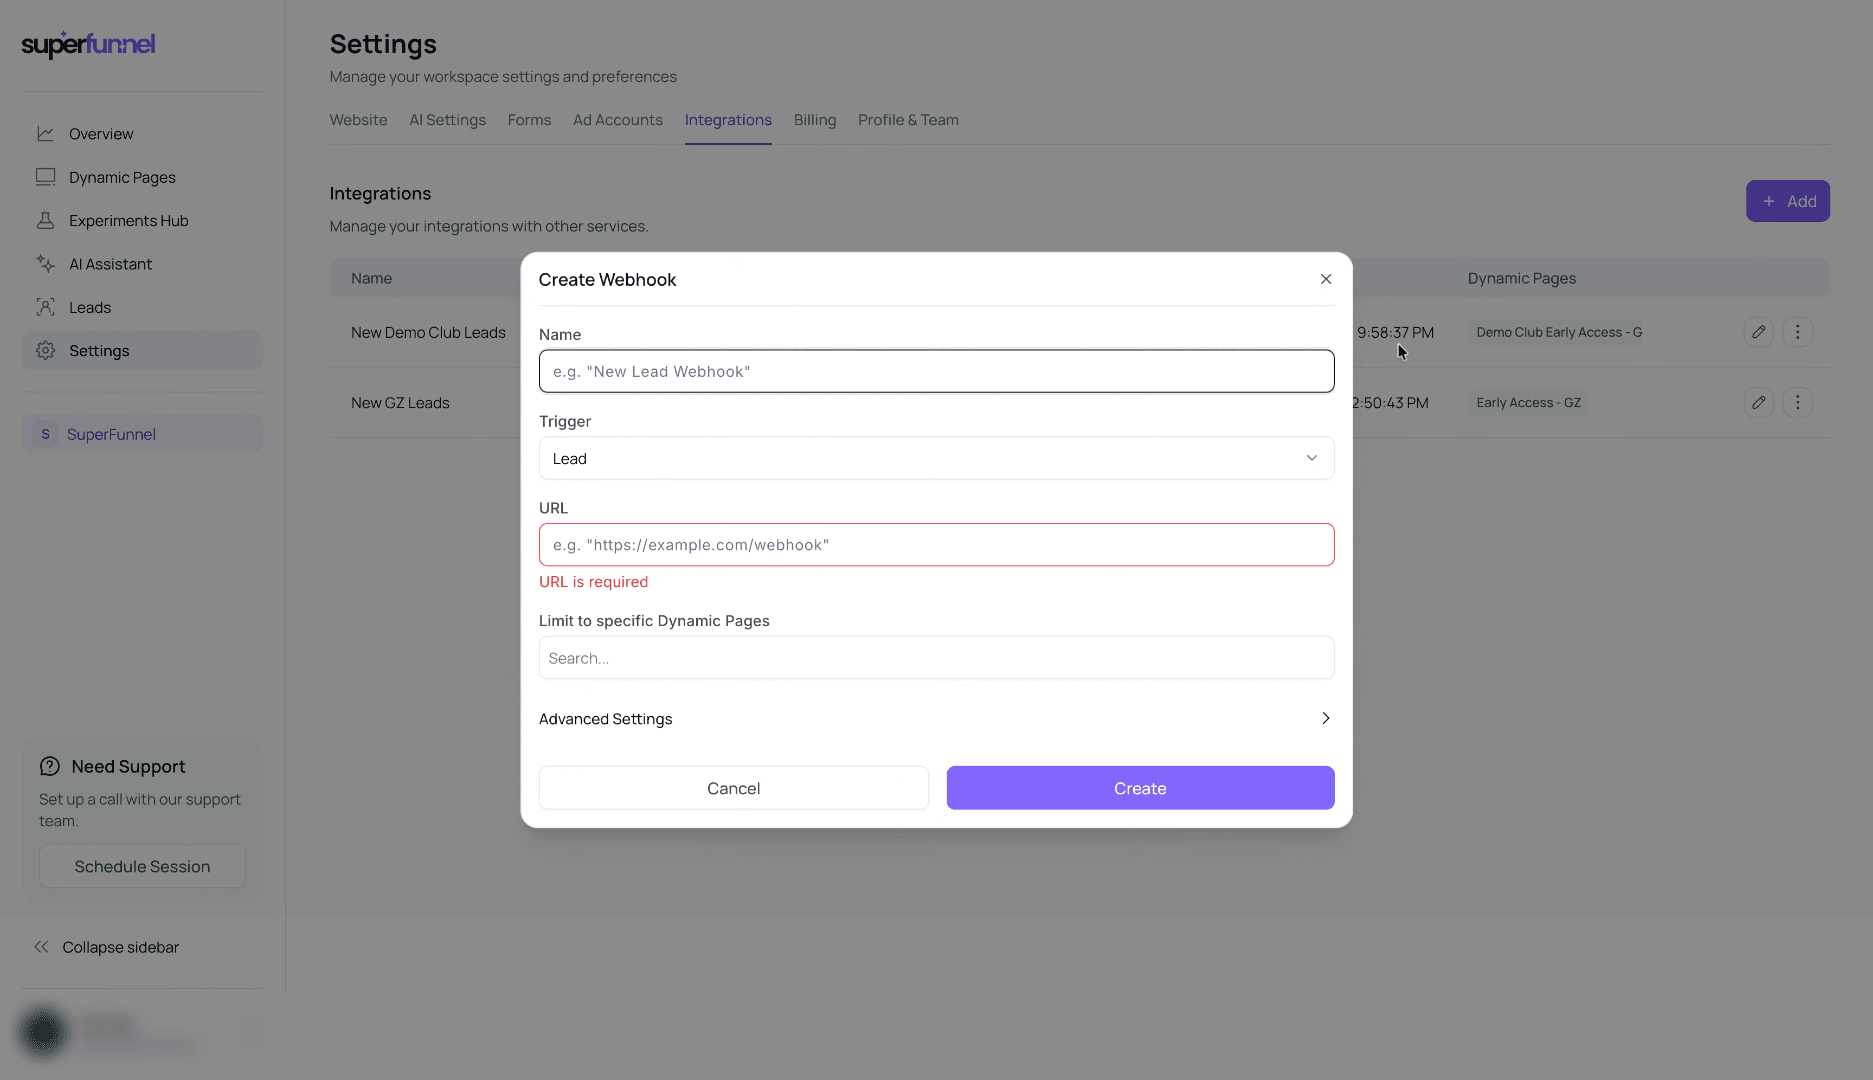
Choose an event field
Click the dropdown and select the event field associated with your form data.
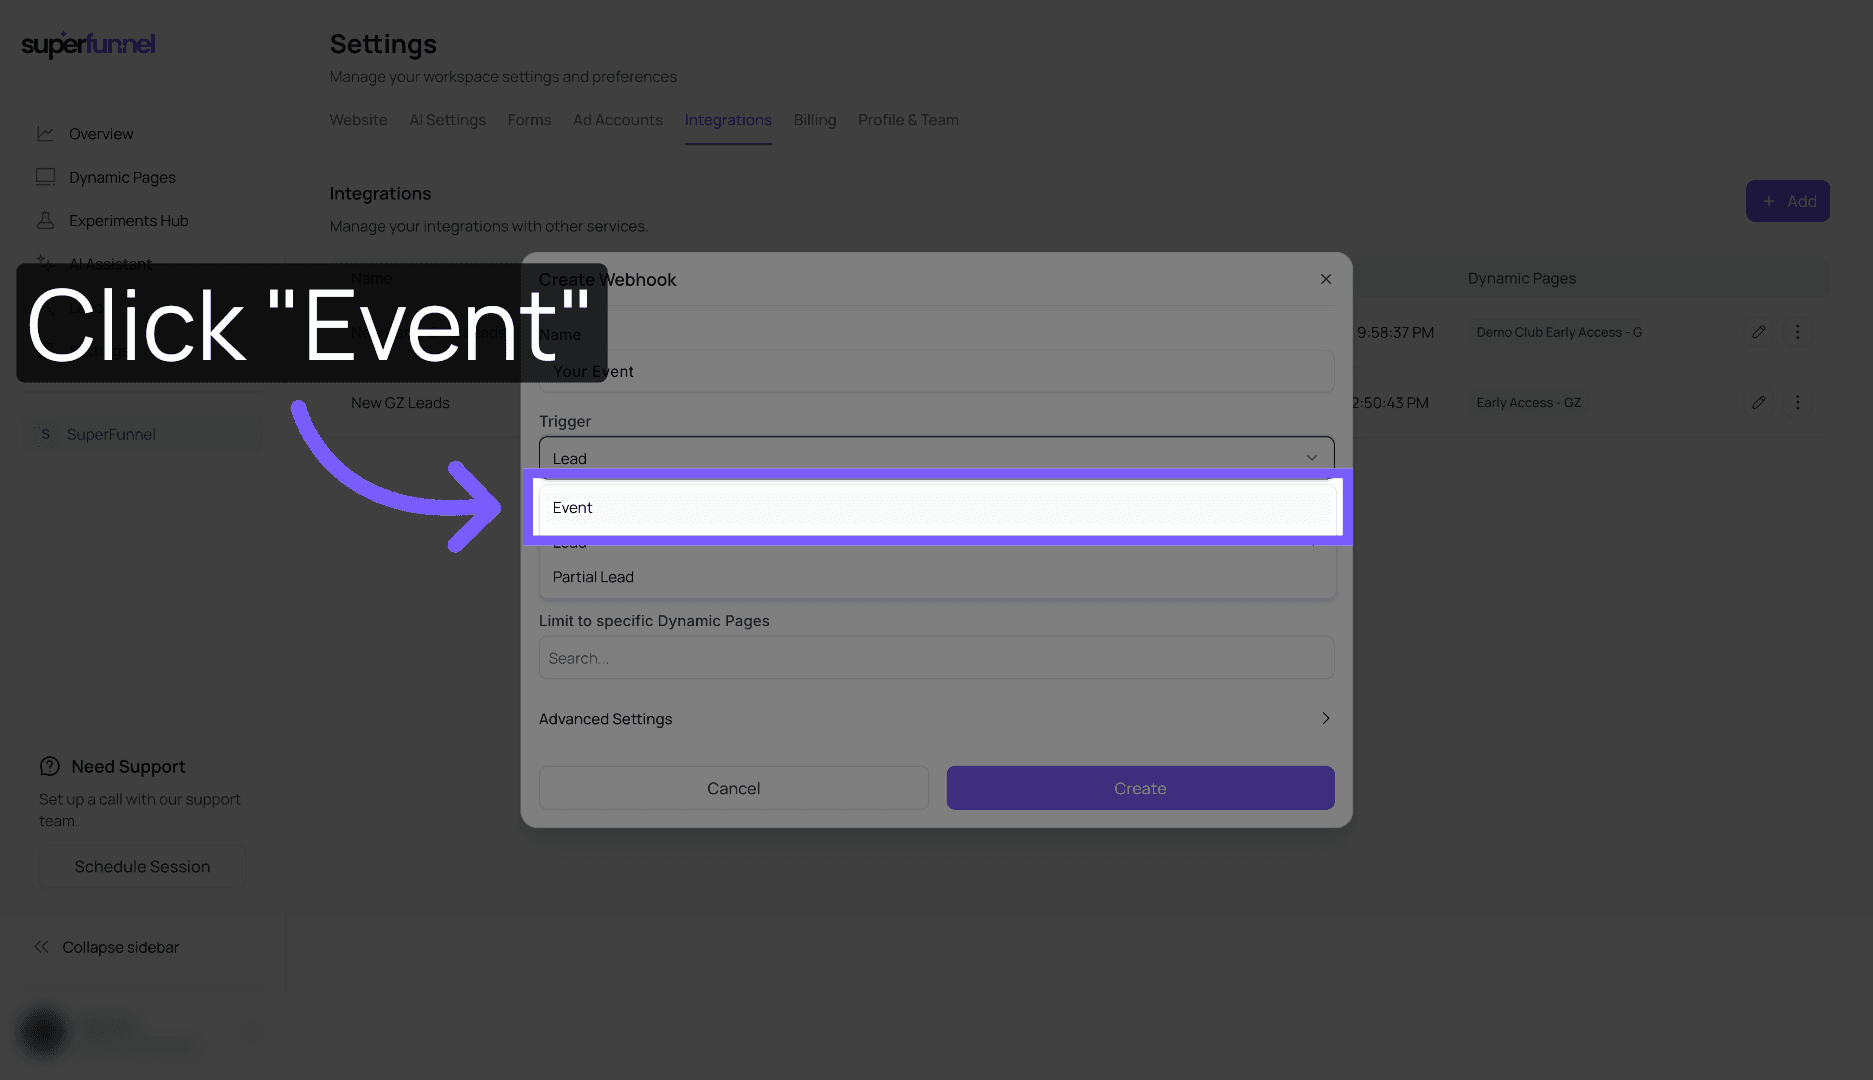
Select event types
Click the event types dropdown to choose which events SuperFunnel will send to the webhook.
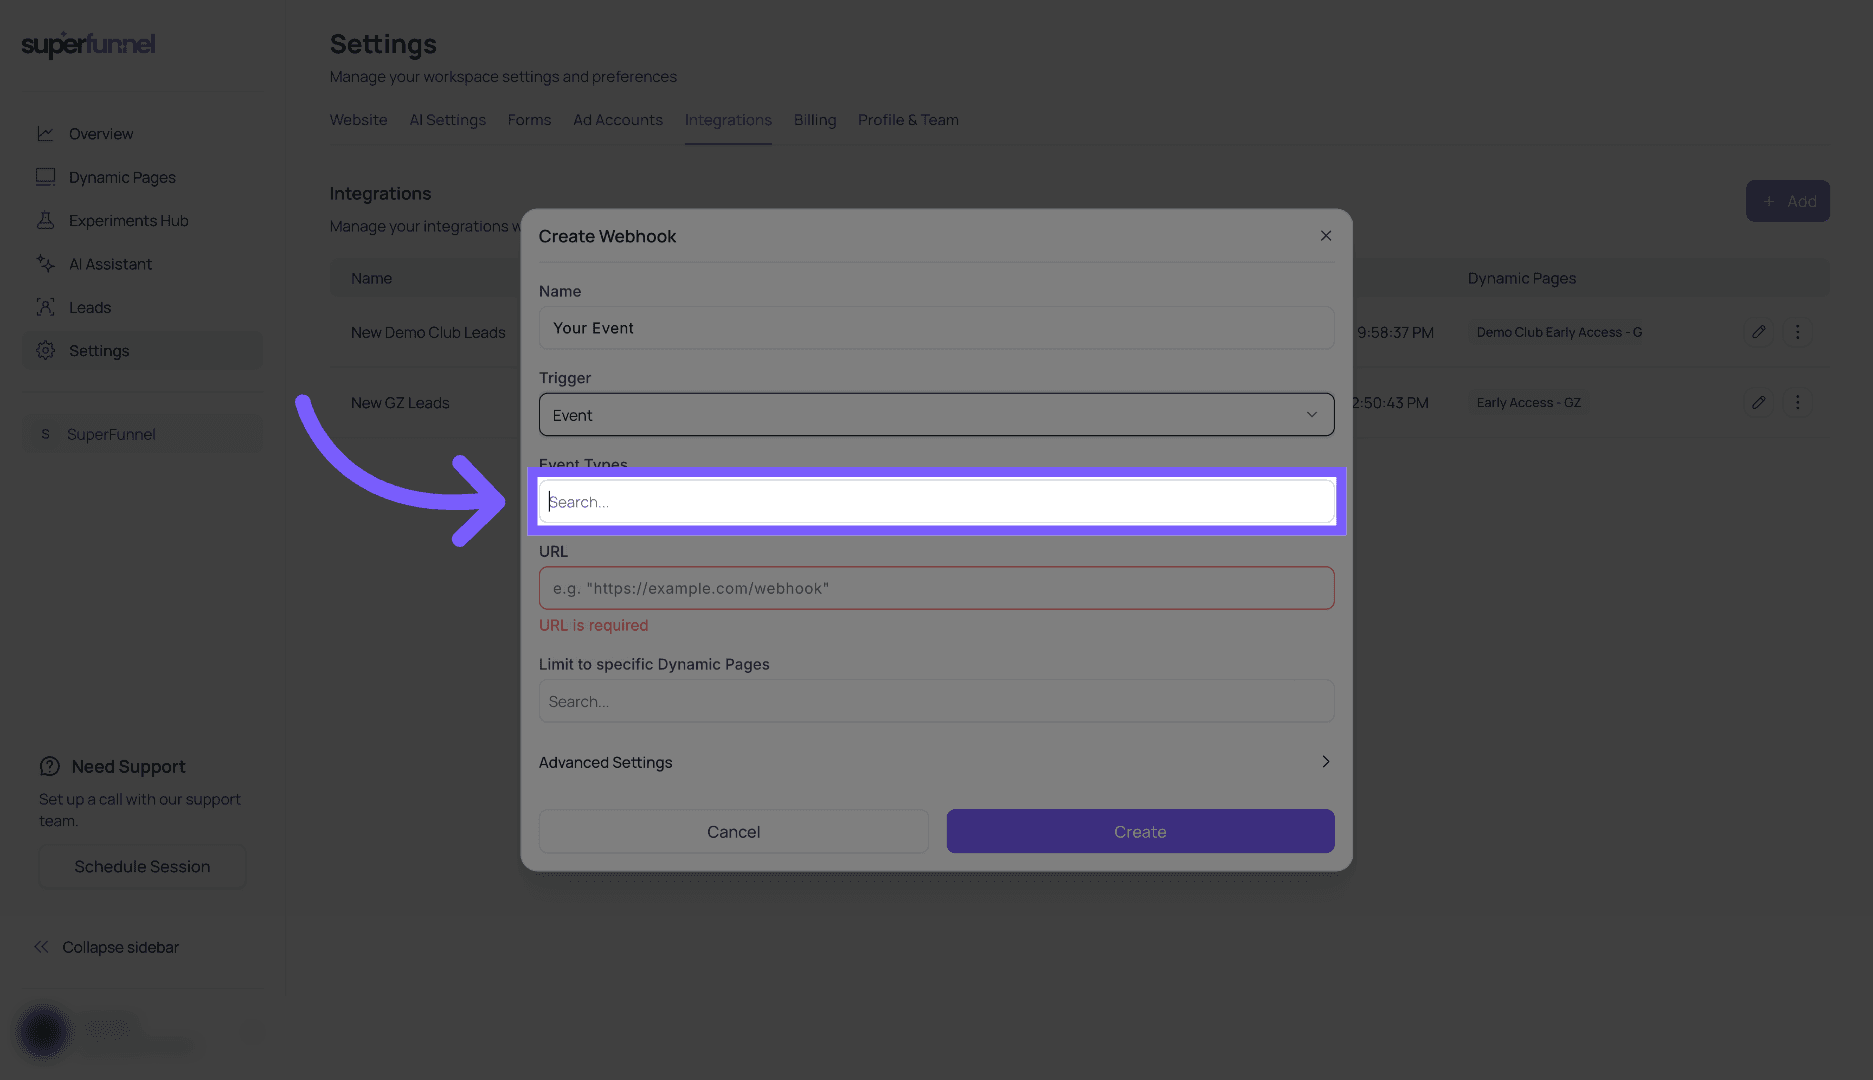
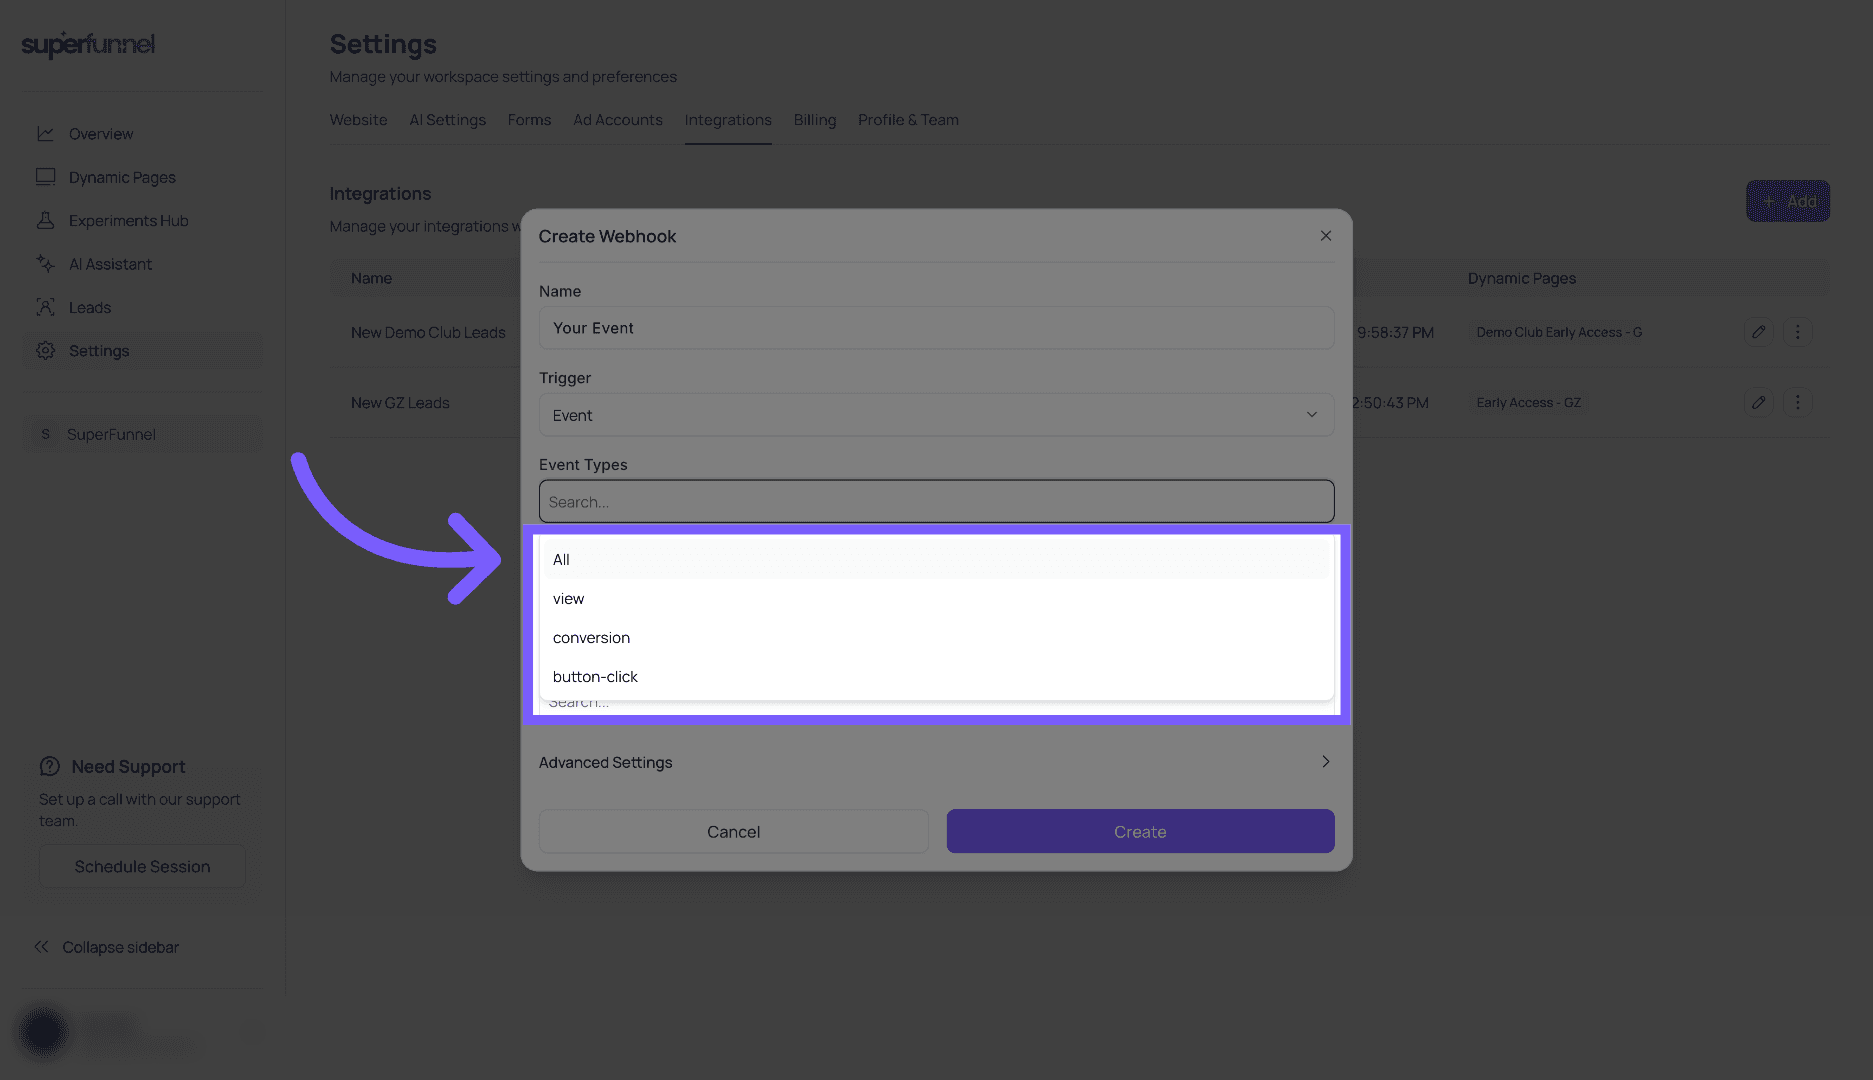
Choose the right event
When syncing form submissions to a backend or CRM, select New Lead (or Form Submit) instead of "All Events." This ensures your endpoint only receives data when a visitor successfully completes a form, rather than on every page view or button click.
Using partial leads? Filter on your endpoint
If you send Partial Lead or All Events, SuperFunnel posts a payload at every step, not just on completion. Gate your handler to only act on payloads that include a key field such as email or phone, so half-finished records don't pile up downstream.
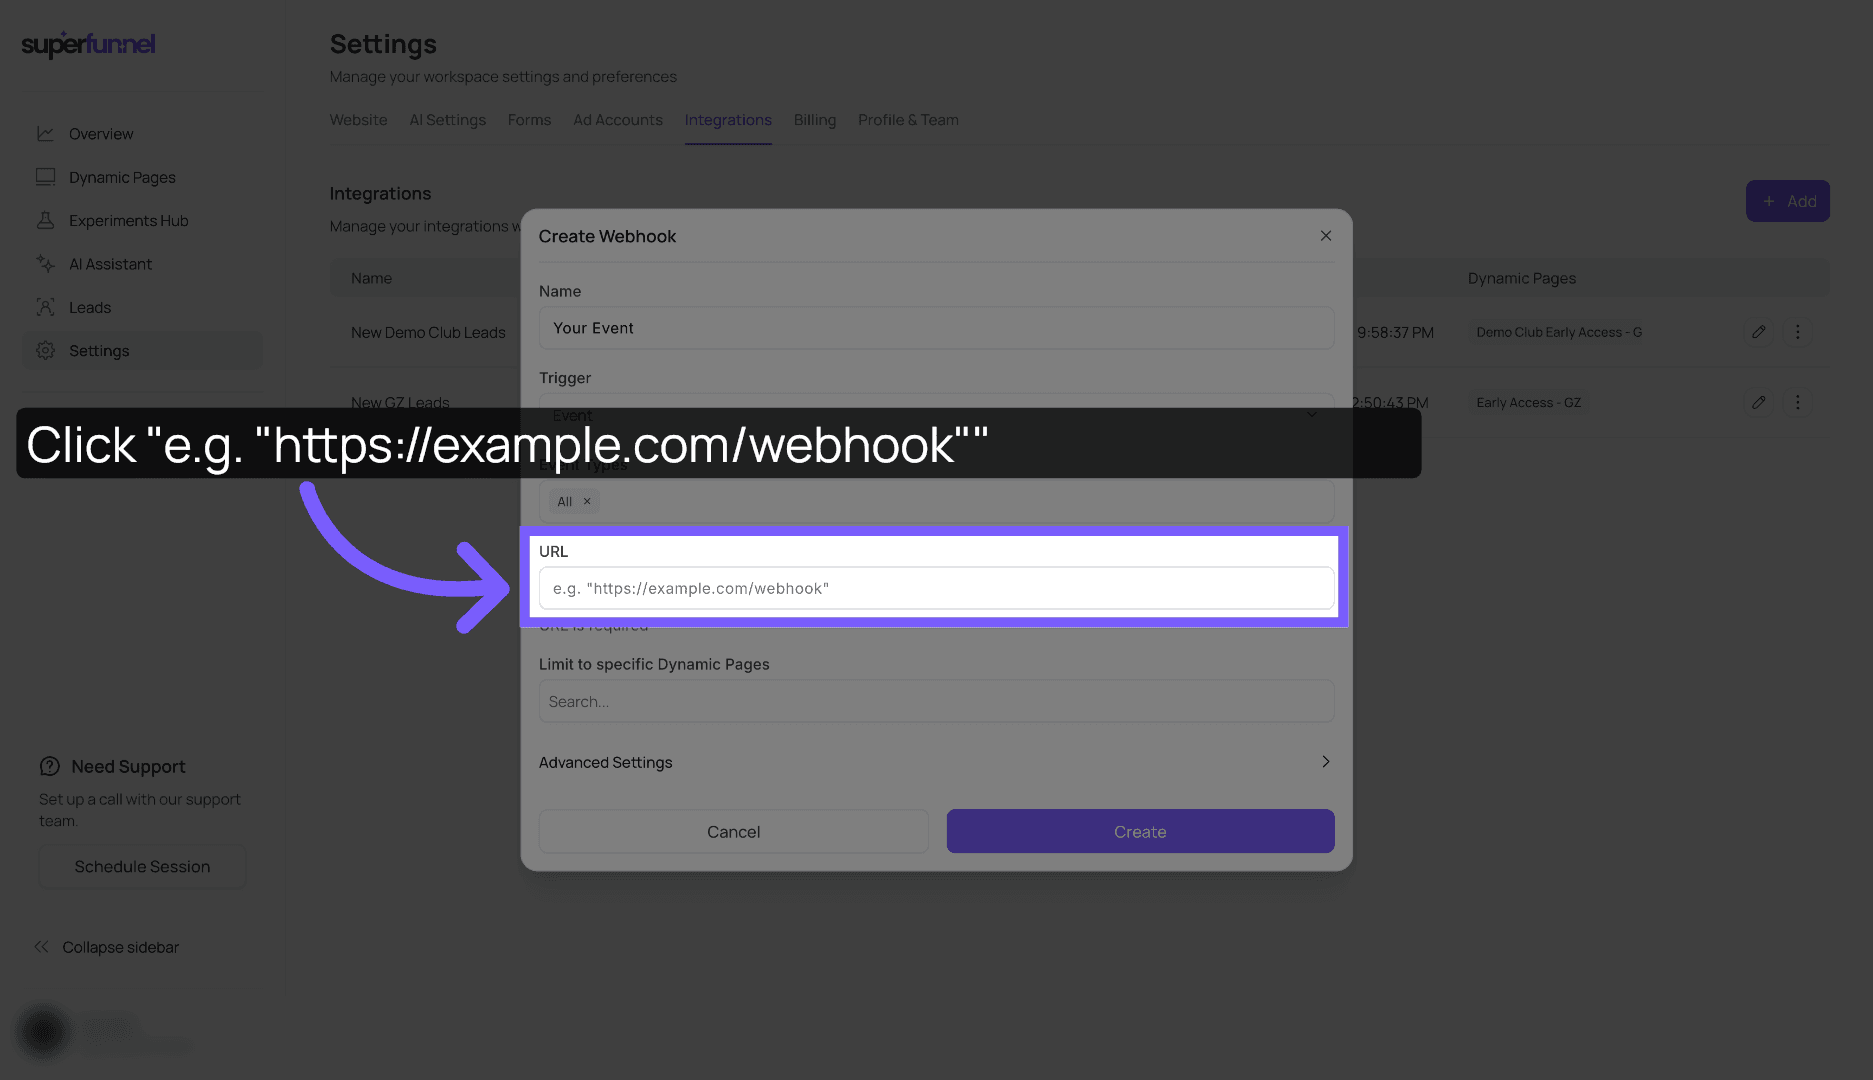
Enter your endpoint URL
Paste your destination URL into the URL field. This is where the event data will be sent.
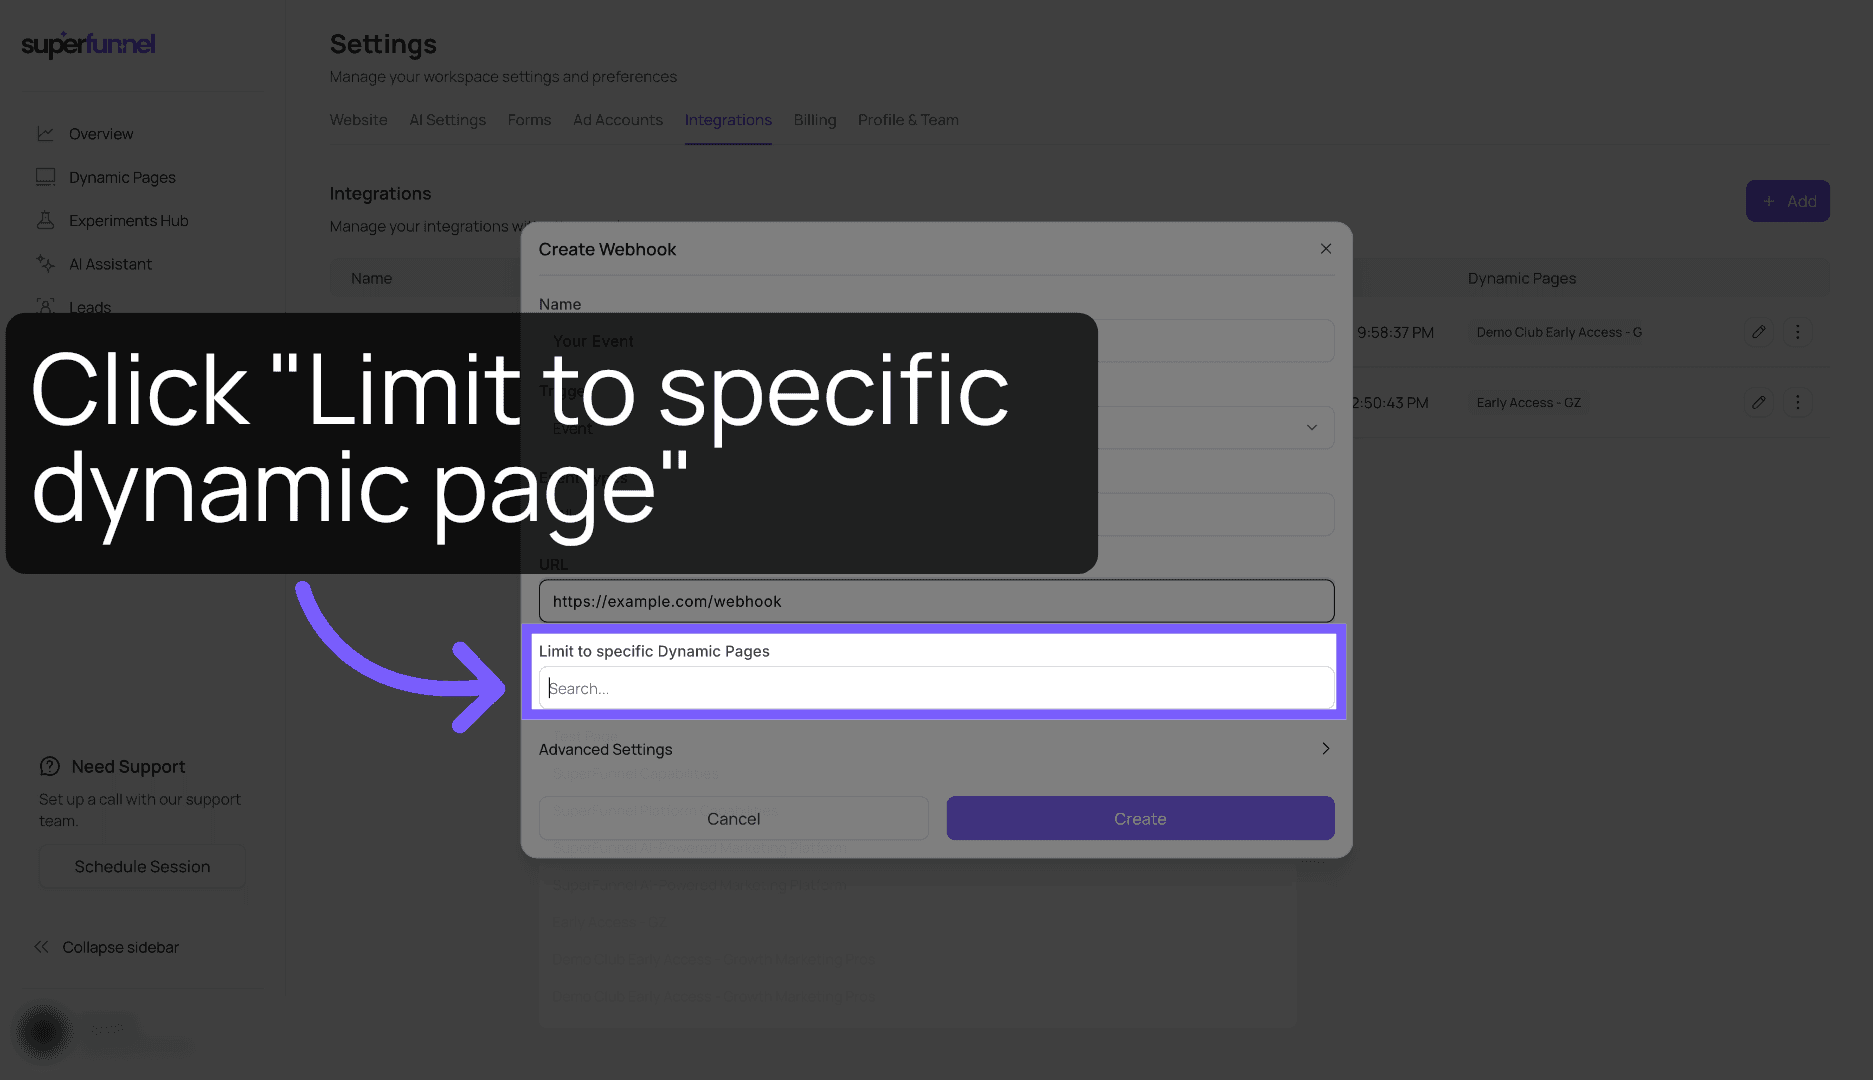
Optionally scope to a specific page
Select a specific page to limit events to that page only. Leave blank to receive events from all pages.
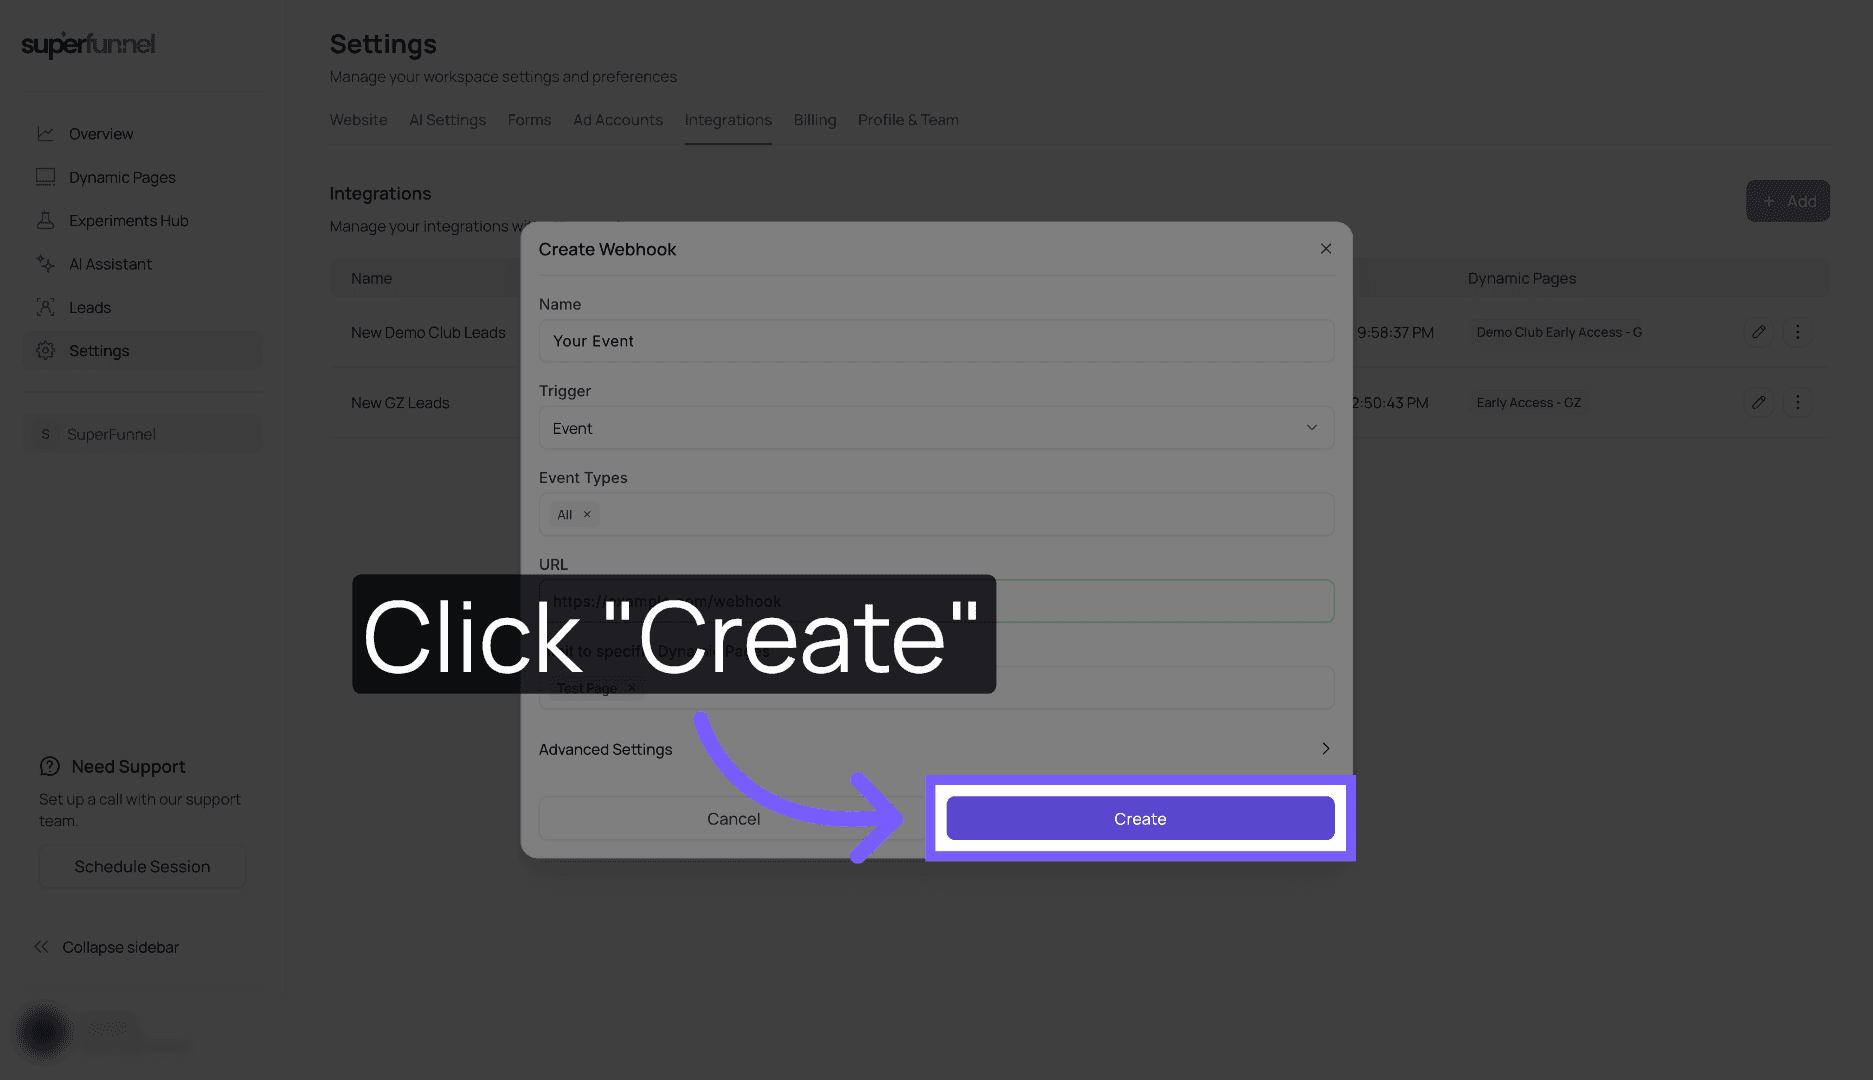
Save and activate
Click Create to save and activate your webhook.
Testing the Connection
After saving, verify the webhook is working before relying on it in production:
- Open one of your published pages.
- Fill out the form with test data (e.g.,
test.user@example.com). - Submit the form.
- Check your backend server logs, CRM, or Google Sheet.
- Confirm a POST request was received with the expected lead information.
Troubleshooting
- No data received — Ensure your endpoint URL is publicly accessible and not blocked by a firewall.
- Incorrect format — Review the JSON payload structure sent by SuperFunnel to ensure your backend is parsing it correctly.
- Need help? — Contact support at
support@superfunnel.ai.
Developer Reference
If you're handling webhook deliveries in code, the following details cover the event types, the JSON each one sends, and how to confirm a request genuinely came from SuperFunnel.
Webhook types
Each webhook subscribes to exactly one type, chosen when you create it. The type field on the root of every payload tells you which one fired.
| Type | Trigger |
|---|---|
new_lead | A visitor completes and submits a form. |
new_partial_lead | Sent incrementally as a visitor fills out a form, before they submit. |
new_event | A visitor interaction on the page, filtered by the event types you pick. |
For new_event, you choose which interactions to receive. The available event types are view, conversion, scroll, button-click, form-submission, ping, scheduled-event, user-error, popup-view, popup-click, and popup-close (or all of them).
Reliability and configuration
- Retry policy — if your endpoint does not return a
200 OK, SuperFunnel retries the delivery up to 3 times with exponential backoff. - Timeout — respond quickly so a slow handler doesn't trigger a retry.
- Object mapping — by default you receive the full JSON payloads documented below. If you define Object Mapping rules in the webhook configuration, the default payload is discarded and your endpoint receives only the structure you define.
Authentication
Secure your webhook with one of two methods, selected when you create it.
Method A: API Key (recommended)
You define a static key in the SuperFunnel UI. It is sent in the HTTP Authorization header on every request, exactly as you entered it:
Authorization: <your-custom-api-key>Reject any request whose header does not match your key.
Method B: Public/Private Key
SuperFunnel generates an RSA key pair and signs every request, placing a token in the Authorization header. Download the public key from the integration's settings and use it to verify that token before trusting the payload. The token is a JWT signed with RS256, carries the claim iss: "superfunnel.ai", and expires one hour after it is issued.
import jwt from 'jsonwebtoken'

// publicKey: the PEM you downloaded from the webhook's settings.
// token: the raw value of the Authorization header (no "Bearer " prefix).
function verifyRequest(token: string, publicKey: string) {
  return jwt.verify(token, publicKey, {
    algorithms: ['RS256'],
    issuer: 'superfunnel.ai',
  }) // throws if the signature is invalid or the token has expired
}Payload format
Every delivery is a POST with a JSON body whose root always contains a type field and a data object.
New Lead (new_lead) — fired when a visitor completes and submits a form. Form answers live under data.form, keyed by field with a value and label. createdAt is a Firestore timestamp (_seconds / _nanoseconds).
{
  "type": "new_lead",
  "data": {
    "accountId": "0RtsITKvLklzoTXqSZaO",
    "campaignId": "UubgLfCPScWvTXN3hSkI",
    "variantId": "bA3YhT2gLXzOCyo7qqeA",
    "websiteId": "CuRMjNPCe4WCVOOITqru",
    "formId": "JYgrG3oeO8GLgKlBPas9",
    "formName": "Lead capture form",
    "submissionId": "TkDAGQktTGHf",
    "form": {
      "name": { "value": "Jane Doe", "label": "Name" },
      "email": { "value": "jane@example.com", "label": "Email" },
      "phone": { "value": "+15555550123", "label": "Phone" },
      "message": { "value": "", "label": "Message" }
    },
    "url": "https://yourbrand.superfunnel.page/landing?utm=spring_sale",
    "queryParams": { "utm": "spring_sale" },
    "ip": "203.0.113.42",
    "userHash": 6240556724501698,
    "sessionHash": 3613007597330076,
    "visitHash": 8079222503494134,
    "id": "6jXpAC82AANQ0GLSq8d5",
    "createdAt": { "_seconds": 1767621070, "_nanoseconds": 212000000 }
  }
}Partial Lead (new_partial_lead) — sent repeatedly as the visitor fills out the form, so most payloads are incomplete. It adds currentStep and lastUpdatedAt, and its id is {sessionHash}_{submissionId}. Gate your handler on a key field such as email or phone so half-finished records don't pile up.
{
  "type": "new_partial_lead",
  "data": {
    "accountId": "0RtsITKvLklzoTXqSZaO",
    "campaignId": "UubgLfCPScWvTXN3hSkI",
    "variantId": "bA3YhT2gLXzOCyo7qqeA",
    "websiteId": "CuRMjNPCe4WCVOOITqru",
    "formId": "1Ts6JMftPUTsOdOMTPWC",
    "formName": "Qualify for Your Debt Consolidation Loan",
    "submissionId": "dpke3fVx1gLP",
    "currentStep": 0,
    "form": {
      "name": { "value": "Jane Doe", "label": "Name" },
      "email": { "value": "jane@example.com", "label": "Email" }
    },
    "url": "https://yourbrand.superfunnel.page/landing?utm=spring_sale",
    "queryParams": { "utm": "spring_sale" },
    "userHash": 6240556724501698,
    "sessionHash": 3613007597330076,
    "visitHash": 5291661038735089,
    "id": "3613007597330076_dpke3fVx1gLP",
    "lastUpdatedAt": { "_seconds": 1767621954, "_nanoseconds": 474000000 },
    "createdAt": { "_seconds": 1767621954, "_nanoseconds": 474000000 }
  }
}Page Events (new_event) — fired by visitor interactions. The event field names the interaction, and the rest carries full visitor context (device, location, referrer, and session hashes). A scroll payload is identical to a view but with "event": "scroll".
{
  "type": "new_event",
  "data": {
    "id": "59176294-00fd-42e2-8003-4afe85421adb",
    "event": "view",
    "createdOn": "2026-01-05T13:49:19.616Z",
    "createdOnUnix": 1767620959616,
    "accountId": "0RtsITKvLklzoTXqSZaO",
    "campaignId": "UubgLfCPScWvTXN3hSkI",
    "variantId": "bA3YhT2gLXzOCyo7qqeA",
    "websiteId": "CuRMjNPCe4WCVOOITqru",
    "path": "/landing",
    "search": "?utm=spring_sale",
    "title": "Home",
    "url": "https://yourbrand.superfunnel.page",
    "queryParams": { "utm": "spring_sale" },
    "ip": "203.0.113.42",
    "clientIp": "203.0.113.42",
    "device": "Desktop",
    "os": "Mac OS",
    "browser": "Chrome",
    "userAgent": "Mozilla/5.0 (Macintosh; Intel Mac OS X 10_15_7) ...",
    "origin": "https://yourbrand.superfunnel.page",
    "referrer": "https://app.superfunnel.ai/",
    "referrerDomain": "app.superfunnel.ai",
    "adNetworkProvider": "unknown",
    "country": "US",
    "region": "CA",
    "city": "San Francisco",
    "isBot": false,
    "hash": 6240556724501698,
    "sessionHash": 3613007597330076,
    "visitHash": 8079222503494134,
    "shortHash": "sA4v2N2Fk",
    "shortSessionHash": "gxX1xyTeY",
    "shortVisitHash": "B0bf3xjzE"
  }
}A button-click event includes the same fields plus an extra object with DOM and element details:
"extra": {
  "rawHTML": true,
  "buttonId": "3c68e6bc",
  "buttonPath": "section#section-html-v1 > div > button.inline-flex",
  "sectionId": "99bbc91cf844d660",
  "sectionType": "html",
  "sectionIndex": 0,
  "buttonType": "form",
  "buttonLink": null
}